One of the ‘not really needed’ things I chose to install was air conditioning. Many people think, “but why?! it’s an open cockpit car it will just blow out!” Which is 99% true, but that 1% of cool air blowing on your during a warm (not crazy hot) day makes or breaks the drive. We’ve had a couple of Maitas and when it was below 100F with the top down, crank up the A/C and it just feels a bit cooler. Over 100F and well, put the top up! Otherwise you risk crazy sunburn!
I partly blame my painter for this add-on. He stopped by a while ago and said, are you adding A/C? I looked at him a bit perplexed and he said “if I build another one, I’ll definitely put A/C in it – it just helps that little bit!” So, off I went, spending more money and got the FFR Gen3 Coupe A/C kit. I had no clue what I was getting into, and looking back, knowing what I know now. I’d do it differently, but here’s what we did to set ours up.
You may have seen my prior post installing the condenser, but now we need to modify the HVAC unit.
First was to establish where the evaporator was going to sit. We knew this was going to take some though, and heavy modification. We determined to setup the HVAC in the firewall, much like any roadster with a heater would setup.
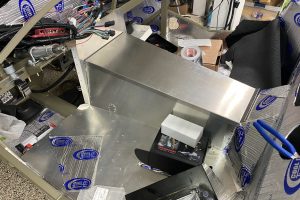
First bit was to cut the hole for the main unit which is a Sirocco Boreal-B HVAC & EVAP unit. It’s a decently sized hole (in the pic below) and our plan was to set it up to give enough room for the glovebox AND have A/C and heater setup. That would require more work!

Now that we had the X and Y axis cut out, we need to figure out the Z… and J, K, F, Q, P axis too! Seriously, this took quite a bit of effort, measurement and modification. Fortunately my son is in college for mechanical engineering, and does wonders with his 3D printer!
Here’s the “before and after” pics of the unit for comparison, then we’ll dig into the build. Notice the OEM build has 2 front facing ports, and the modified version has side facing ports – but wait, there’s more!


So many things were modified on this unit!
We realized with the engine installed, the blower unit would be too low and hit the engine, so we had an idea from one of the local FFR guys to flip the blower motor. Great idea, but mods needed to happen! The body that the blower mounts to is angled, and we needed it to be flat. Out came the Dremel, and we got to it!


Ok – that was nerve racking! Cutting up a brand new HVAC unit wasn’t on the original docket, but it’s done! Next up we mounted the unit to check clearance. It fit on the engine side, but the forward blower ports weren’t going to work with the dash setup.

We pulled off the blower ports, actually had to break them out but thankfully it worked well. Next my son printed some ABS filler ports and we epoxied them into place.


So now we had a flat front plate, but where’s the air going to go? We had to modify the unit to blow from the sides, let’s break out a hole saw and get to it! YIKES! Oh, by the way, if you’re paying attention – we had to move our Wilwood e-brake module from it’s prior installation.


My son printed the side ports in ABS material to withstand the hot/cold and we mounted them on the unit. We had a spare HVAC unit that I borrowed from the painter, you can see the comparison of original, vs our new HVAC setup!


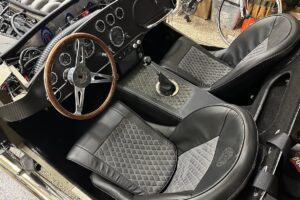
Here are some pics with the modified unit in place


Ok – that was pretty crazy for modifications. Definitely a crazy add-on, would I do it again? YES, but probably get a different HVAC unit, and piece things together. Stay tuned for the A/C hose installation!
Discover more from Cobra Dreams
Subscribe to get the latest posts sent to your email.


