Installing the air conditioning condenser
This update covers the air conditioning condenser. Related notes live on the Factory Five Cobra build hub.
air conditioning condenser: Why add A/C to a roadster
Adding air conditioning to the roadster was a custom job. Therefore it is not part of FFR’s standard setup. Who puts A/C in an open-top roadster? Builders who may add a soft or hard top later. Also, some of us just want cool air on hot days. For example, we have owned a few Miatas over the years. Cool A/C on a hot drive can change the whole day.
I bought the kit meant for the Type-65 coupe. In hindsight, a custom kit might have been easier. Still, learning as you go is a huge part of this build. There are several setup differences. One is the air conditioning condenser layout.
Type-65 condenser vs roadster mounts
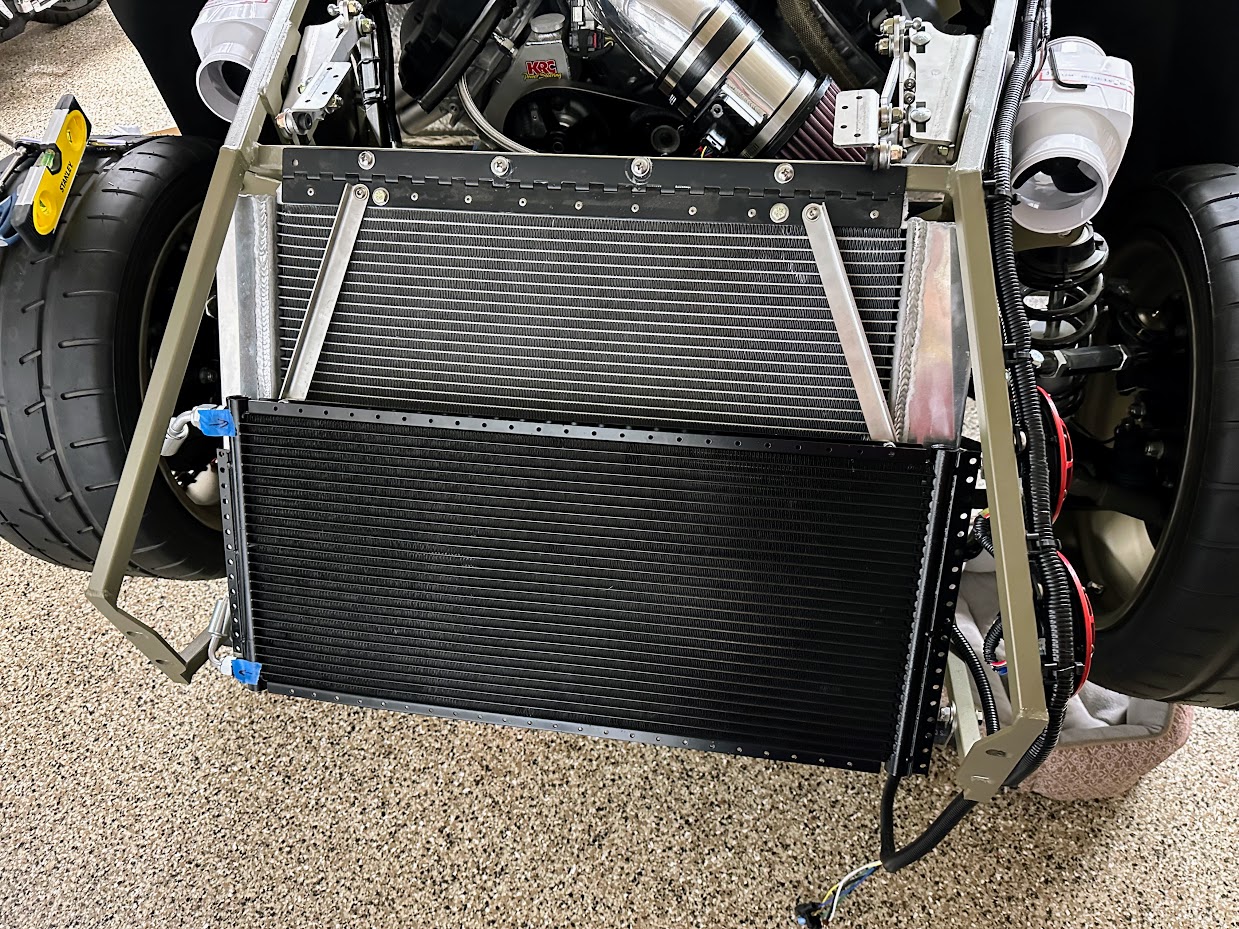
On the Type-65, the condenser mounts top-forward and bottom-inward. On the roadster it is the opposite. So I swapped the mounting arms to the top of the radiator. Then I mounted the bottom to the radiator with spacers. Ultimately it was a simple change.
Fitting the condenser
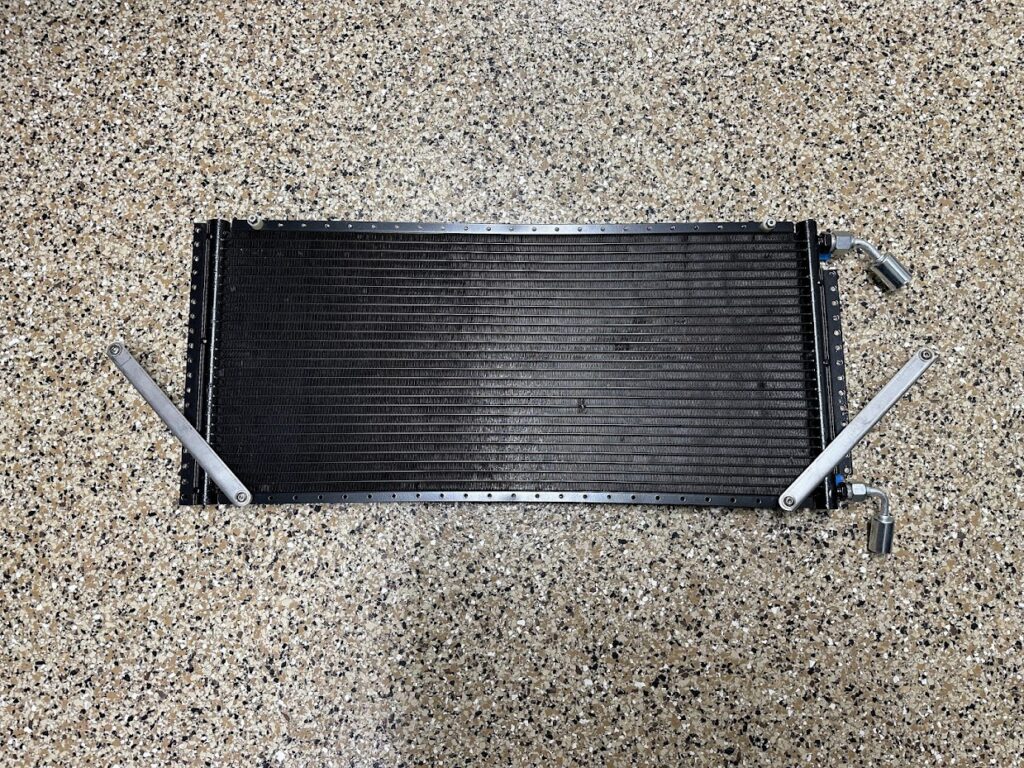
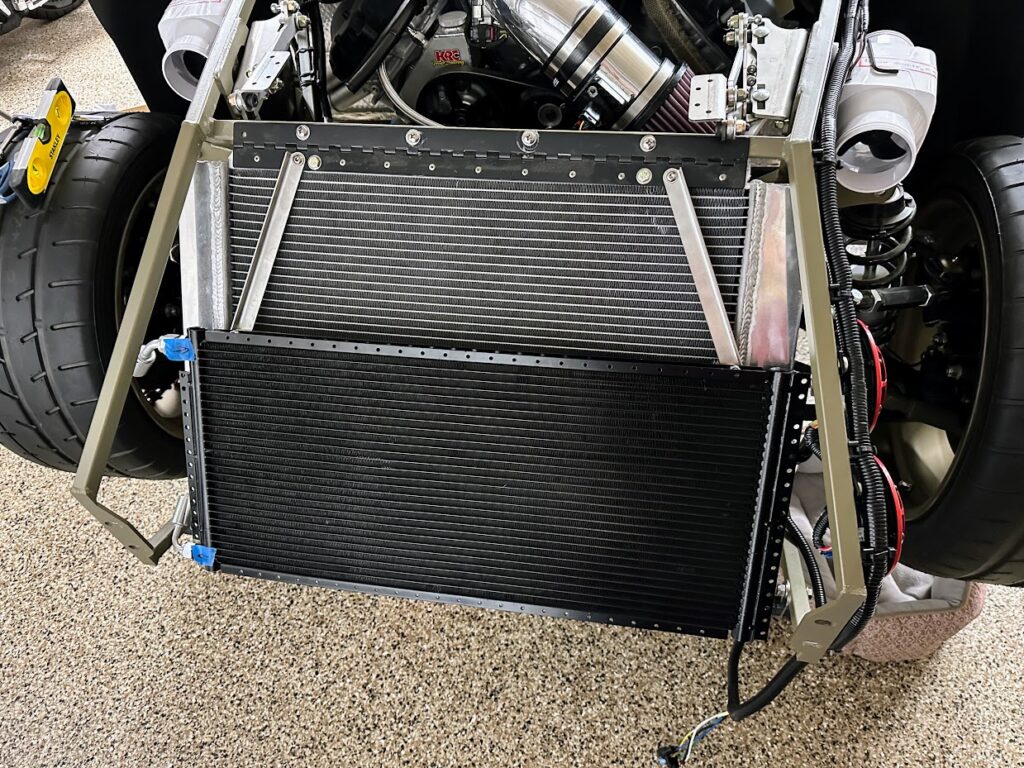
The larger #8 port goes on top of the condenser. Therefore the left photo shows the stock FFR layout. However I had to flip it for the roadster. Next, look at the right photo. The bars sit on top. In other words, it is a mirror of the FFR config. After that I attached the bars to the Breeze Radiator hinge. As a result, the air conditioning condenser fit well.
Clearance fitting and radiator guard
Clearances differ a lot between the roadster and the coupe. So I ordered a new fitting for the bottom. The kit fitting was 45 degrees. However I needed a 90 degree fitting to clear the 3/4″ bar. Therefore I ordered the Vintage Air 35832-VUG Beadlock O-Ring Fitting 90 Degree No 8.
Next I need a new radiator cover because of the condenser. For example, I will probably use a Nomex Honeycomb Radiator Guard Protector Screen Mesh, 18 x 22. Then I will paint it black.