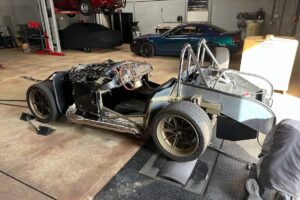
Now that the basic installation is done on the front of the car, it’s time to tackle the IRS setup. There are several components that comprise the IRS.
- 3.55 8.8 Super Differential Center Section
- 2 Half-Shaft/Axles
- 2 Spindles + 2 Hubs
- Toe Adjustment Arms
- Upper Control Arms
- Lower Control Arms
All these bits plant the rear tires on the ground, and deliver power equally via the traction-lok differential. Normally, Factory Five offers this as an option – but for the 25th Anniversary car, it’s a standard component.
The manual has ~60 pages covering installation, about double work required as the independent front suspension. I purchased the differential, spindles and hubs from Mike Forte back in December.
First steps are to prepare the aluminum spindles and differential. I had to purchase a 5/8″ drill bit, not very common in your average toolbox – but ~ $15, I’m not complaining – although my wrists got a workout~


Next, the ‘ears’ of the spindles need to be cut off, this is because the stock spindles would not fit the FFR geometry without modification. A simple line from the hole on top to the bump on the bottom. Using a sawzall, it takes time, but eventually get through… My best option was to use a 14TPI metal blade, with some oil to lubricate the cut.


The hubs need some pre-work as well, the mustang studs need to be knocked out – simple hammer and vice work. Pressing the new studs into place can work with an impact drill or stationary press.


Next was to mount the hubs on the spindles and start assembly of the toe, UCA and LCA. Some missing parts from FFR, so I can’t fully complete the installation yet, but it’s 99% there!


To finish up some items, I decided to spray paint the half-shaft/axles to protect them from rust.


And here are all the parts, waiting on a few bits to finalize. FFR shipped the missing items and it will all go together quickly!

Discover more from Cobra Dreams
Subscribe to get the latest posts sent to your email.


